Feeds:
Posts
Comments

Red velvet brownies

Yes, they are that red! Bet you can't eat just one.

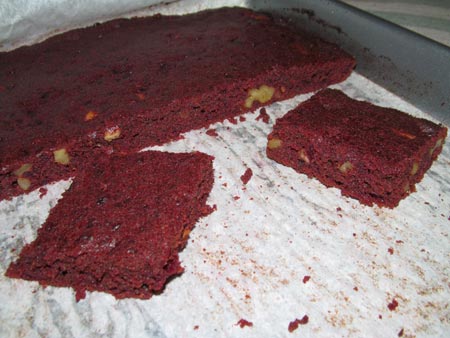
Yes, they are that red! Bet you can’t eat just one.

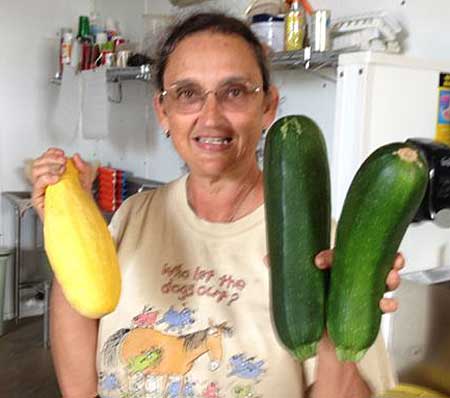
Bee Heaven Farm CSA members have gotten beets a few times in their shares this season. There’s a pretty good chance those homely root vegetables are still hanging around somewhere in the back of your refrigerator. Now, don’t get me wrong! I love beets, and grew up eating them — boiled, roasted, pickled. But never in baked goods. Until now…

Beets were the original coloring agent used in some red velvet cake recipes back in the day. They are great for baking because they become sweet when roasted, and hold moisture. Plus, the earthy beet flavor combines beautifully with dark chocolate.

I found this recipe for beet brownies on a lovely food/farm blog, and tweaked it a bit (my changes are in italics). The original recipe calls for a topping of fresh blueberries, which sounds fabulous; but even plain and warm out of the oven, they are scrumptious. I’ve made this recipe several times, and each time the brownies get gobbled up in no time flat, and people beg me for more. Enjoy!

Red Velvet Brownies

•    1 cup of beet puree*
•    3.5 ounces (one bar) of good-quality chocolate (at least 70% dark)
•    3/4 cup all-purpose flour
•    2 teaspoons baking powder
•    pinch salt (about 1/8 tsp)
•    2 teaspoons vanilla extract
•    7 tablespoons butter, softened
•    1/3 cup brown sugar
•    2 eggs, room temperature
•    1/2 cup chopped walnuts (optional)

* Note: Roast about 5 or 6 beets, then let them cool. Using gloves, remove skins, then puree in food processor. If you roast more than you need for the recipe, pureed beets are a delicious side dish dressed with olive oil and lemon juice.

1.    Pre-heat oven to 350 F.
2.    Melt chocolate over double-boiler. Set aside.
3.    Whisk together flour with baking powder and salt and set aside.
4.    Cream butter and sugar together. Add vanilla and eggs, one at a time, until the mixture is creamy. Add melted chocolate, beet puree, flour mixture, and walnuts. Mix well.
5.    Pour batter into 9 x 13 baking pan lined with baking parchment and bake for 25-30 minutes.
6.    Let cool and cut into triangles. Serve with fresh-picked blueberries and share with family.

One never knows what’s going to turn up in the barn on Friday, when it’s time to pack the CSA shares. Last week, it was zucchini and other squash from Worden Farm. Most were average sized, some maybe a bit on the small side. But, there were a few that Chris Worden slipped in to the order that were a bit larger — “as big as a baseball bat,” he warned Farmer Margie Pikarsky.

Farmer Margie with giant squash.

Farmer Margie with giant squash.

But Margie begged to differ. “This is a bowling pin,” she told me, holding up a yellow squash. “And these are clubs,” she added, holding up two giant green summer squash. They certainly looked like they had heft, and could hurt somebody’s noggin.

Zucchini the size of her arm.

Zucchini the size of her arm.

“It’s the size of your arm,” I pointed out. We put the vegetable side by side with Margie’s forearm, which normally appears sturdy and strong. But next to the giant green club, her forearm looked thin and frail. Now that is a monster of a vegetable!

Stuffing the boats.

Stuffing the boats.

But it didn’t stand a chance against the hungry farmer. Out came a big kitchen knife the size of a machete and whack hack smack the clubs were split in half. Their innards were carved out with a spoon to make boats, no, dugout canoes one could use to traverse the Everglades. Those insides were tossed into a bowl along with heirloom tomatoes, scallions, pepper jack cheese, crumbled organic corn chips, a few seasonings, and maybe a few other scraps that were lying around.

The stuffed zucchini baked in the oven at 350 for about 30 minutes. Out came these delicious marvels, one per person. And that was all you needed to fill you up for dinner. Yum!

Bet you can't eat the whole thing!

Bet you can’t eat the whole thing!

Last Friday, the CSA share boxes were stuffed to capacity, both the family and small sizes.

As soon as I opened the flaps of the family share box, I saw its contents were packed solid, with each vegetable fitted carefully in its place, just like a puzzle. I knew I was going to have a problem remembering where everything went, after I was done arranging and photographing.

So I pulled out my smartphone and snapped pictures as I started to unload the contents. They were my map — and now I share them with you in the form of two short animations. Dive in!

Family share animation

Family share animation

Small share animation

Small share animation


Mud pie

Black sapote pie getting gobbled up by the farm crew. Only crumbs were left.

Black sapote pie getting gobbled up by the farm crew. Only crumbs were left.

Black sapote is called chocolate pudding fruit because as the fruit ripens, its flesh changes from green to dark brown, like rich chocolate, and develops the consistency of pudding.

I suggest calling it mud pie fruit, because your hands get wonderfully messy as you prepare the fruit for eating. The soft pudding-like flesh smears on your fingers as you dig out brown shiny seeds and their membranes, and peel off papery skin before eating. Hands get messy fast! Fun for those who enjoyed making mud pies back in the day — only this “mud” is much tastier. Mmmmm lick those fingers, it’s too good to waste!

If you haven’t already gobbled up the fruit from last week’s CSA share, here’s a recipe for a pretty good mud pie made with black sapote. Or you can skip the crust and bake the filling in custard cups, then serve it chilled, with or without whipped cream.

The recipe is by Noris Ledesma, but I’ve made a few tweaks (in italics). Feel free to make your own changes to make this your own.

Black Sapote Pie

• ½ cup brown sugar
• 1 tsp. each ground cloves, cinnamon
• ½ tsp. salt
• 2 eggs
• 1½ cups mashed black sapote (about 5 fruit)
• 1½ cups coconut milk
• 1 tsp. vanilla
• 1 unbaked 9″ deep-dish pie shell

Mix sugar, salt and cloves in small dish. Beat eggs in large bowl. Stir in black sapote and sugar/clove mixture. Gradually stir in milk and vanilla. Pour into pie shell. Bake 15 minutes in a preheated 425°F oven; turn temperature down to 350°F and bake about 30 minutes more or until firm. Serve with whipped cream.


Farmer Margie Pikarsky recommends Wholly Wholesome organic whole wheat pie shells. I found them at Whole Foods and Publix.

Recently I brought a Mud Pie to treat the hard working crew at Bee Heaven Farm. I managed to grab a picture of the pie before it disappeared. We didn’t have whipped cream, but that didn’t take anything away from the experience. One person suggested adding a pinch of allspice, which I’ll try the next time.

If you have more black sapote fruit than you need for pie, you can clean and freeze the fruit. It will keep for about 6 months.

Ripe black sapote

Ripe black sapote

Funny how a recipe morphs and gets tweaked as it passes from one cook to the next.

Recently, Laura Lafata, the chef who blogs on La Diva Cucina, unearthed a recipe for black sapote bars on another local food blog, Tinkering With Dinner. Bill Jacobs had been a Bee Heaven Farm CSA member and would document his culinary adventures every week. In fact, over the years, he came up with two versions of black sapote bars.

Just in time for black sapote season, La Diva tinkered with version two, and posted the tweaks on her blog. I suggested to Margie that I make the bars to sell at farmer’s market. Margie said her tree was loaded with fruit, and sent me off with enough to make a batch.

La Diva had commented that the bars were tasty but very, very crumbly. I used her version for the fruit filling. But to improve the crust, I followed the recipe for strawberry oatmeal bars which I found on the Pioneer Woman’s blog.

I left out coconut and walnut, and the crust is still crumbly, but not intolerably so. The fruit filling tastes like prune or plum filling, so feel free to jazz it up. I added a bit of cayenne to give it a small kick.

Wait until the bars cool before you cut and eat them. Bet you can’t eat just one! If there’s any left, they freeze well.

Look for Black Sapote Bars at the Bee Heaven Farm tent, at Pinecrest Farmer’s Market this Sunday from 9 am to 2 pm. Or make your own with this fourth generation recipe. Enjoy!

Black sapote bars wrapped, boxed and ready for market.

Black sapote bars wrapped, boxed and ready for market.

Black Sapote Bars

Crust:
1 ¾ stick cold butter, cut into pieces
1 ½ cups all-purpose flour
1 ½ cups oats
¾ cup packed brown sugar
1 teaspoon baking powder
¼ teaspoon salt

Filling:
1 ½ cups (5 fruit) black sapote, cleaned
1/3 cup sugar
¼ teaspoon ground cinnamon
1 teaspoon cocoa powder
1 teaspoon vanilla extract
¼ teaspoon fine ground coffee
¼ teaspoon salt
1/8 teaspoon cayenne (optional)

1. Preheat oven to 350 degrees. Butter a 9×13 baking pan.

2. In a large bowl, mix together flour, oats, brown sugar, baking powder, and salt. Cut the butter in with a pastry cutter until it looks like coarse crumbs.  Sprinkle half the mixture into the pan, and pat it lightly to pack it down.

3. In another bowl, mix together the cleaned black sapote (no skin, no seeds) with the other filling ingredients. Spoon the mixture on top of the bottom layer of crust, and spread evenly with a butter knife.

4. Sprinkle the other half of the oat mixture over the top, and gently pat down.

5. Bake until light golden brown on top, about 25-30 minutes. Remove from oven and let cool in pan. When cool, cut into squares and serve.